How to resize a server
WordFleet users are free to host as many WordPress sites as they can fit on their servers. Of course, each server has it limits in term of memory and storage space.
When you start to hit these limits, you can choose to either create new servers and distribute sites between them, or you can increase the size of your server as shown below.
How are resizes charged?
Like most other operations on WordFleet, your credit will be prorated based on the price difference. If scaling down, you can request proration or an immediate partial refund.
Resize a server:
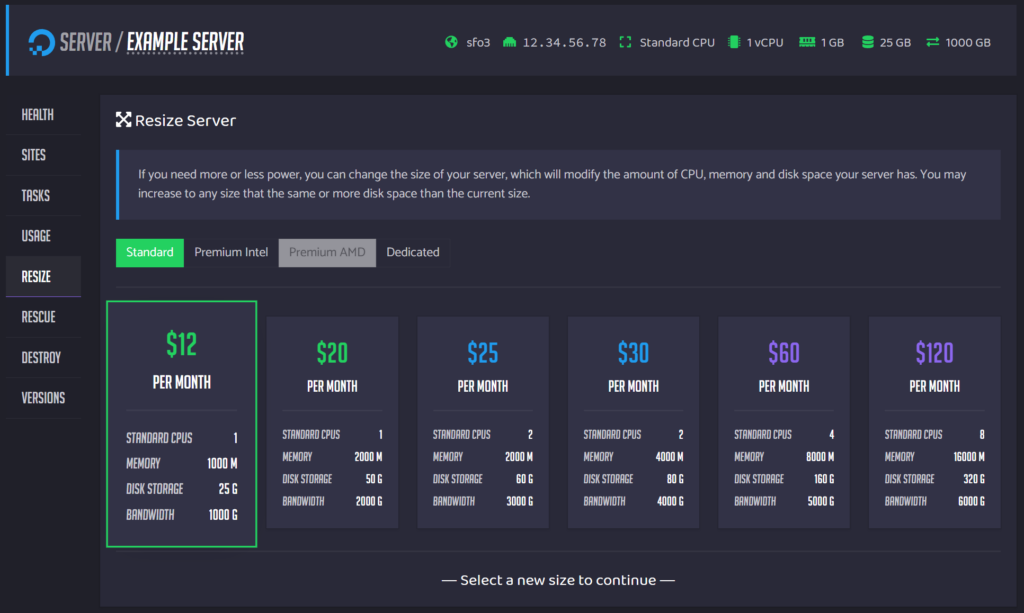
- Navigate to the “Servers” page and click on the server you want to resize.
- Click on the “Resize” button on the left.
- Choose the new type of server series and size.
- Accept or decline the increase in disk size.
- Warning: if you expect to scale the server back down to its original size in the future, you need to decline the disk size increase. Once the disk is resized for the larger server, the server cannot be scaled back down.
- If you allow disk size increase, and then need to scaled down to a smaller server, you will need to spin up a new server and transfer the sites manually to the smaller server.
- For DigitalOcean, you can always accept the disk size increase later from the server resize panel.
- For Linode, you need to scale down and then scale up, accepting the size increase on the next size increase.
- Warning: if you expect to scale the server back down to its original size in the future, you need to decline the disk size increase. Once the disk is resized for the larger server, the server cannot be scaled back down.
- Click on the “Resize Server” button.
- It will take a few minutes for the server to resize and restart.
- Your sites will not be available during the resize.
- It will take a few minutes for the server to resize and restart.